
In the sweltering heat of an Iowa summer, the last thing that I want to do is stand over a simmering saucepan. Mind you, I love spending time in the kitchen dreaming up and preparing thoughtful, slow-paced meals, but when the thermometer soars and stomachs grumble, I find that simple and fresh is always best.
Leafy green salads are my personal go-to base for a light meal, topped with whatever nuts, seeds, crisp fruits and veggies, or leftover cooked grains that I have on hand. While tasty, these quick-fix salads often lack substance and tend to get soggy if not eaten immediately. Fresh, raw foods certainly take the edge off midday hunger and provide ample nutrients, but without the intake of proteins and healthy fats, you might find yourself missing the true feeling of satiety and energy balance throughout your day.
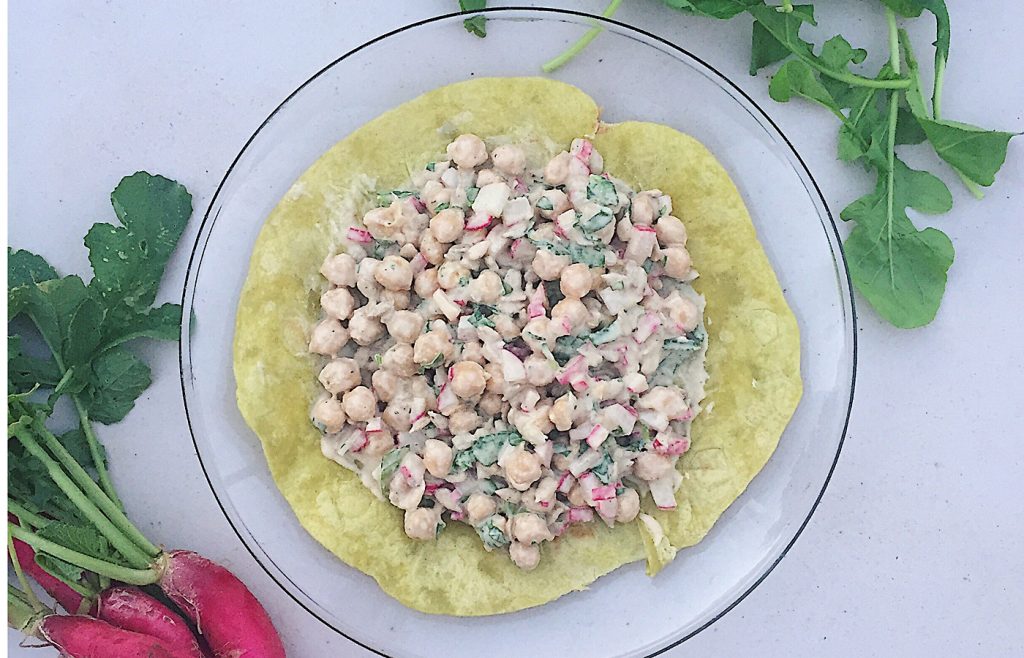
My latest solution: Chickpea Salad Wraps! Suitable for all dietary preferences and persuasions, this chickpea salad is an excellent source of protein that can easily be scooped onto a leafy salad, made into a full entrée as a satisfying wrap, or bundled up in small chard or collard green leaves as a potluck appetizer. The chickpea salad in these wraps can be tossed together in less than 10 minutes (no heating or cooking required), keeps well for days in the fridge, and can easily be doubled (or tripled!) for make-ahead meals and large gatherings.
While this recipe is reminiscent of a tuna salad or deviled egg sandwich, I sought to create a plant-based dish that wasn’t trying to disguise itself as a “mock” something else. This recipe draws upon the flavors of the Iowa summer harvest and has a character all its own, brimming with whole-food goodness grown right in our local soil. Take these flavors and ingredients as a summertime suggestion, and then let it evolve with what’s in season and the tastes that you’re hungry for.
Chickpea Salad Wraps
Serves 2
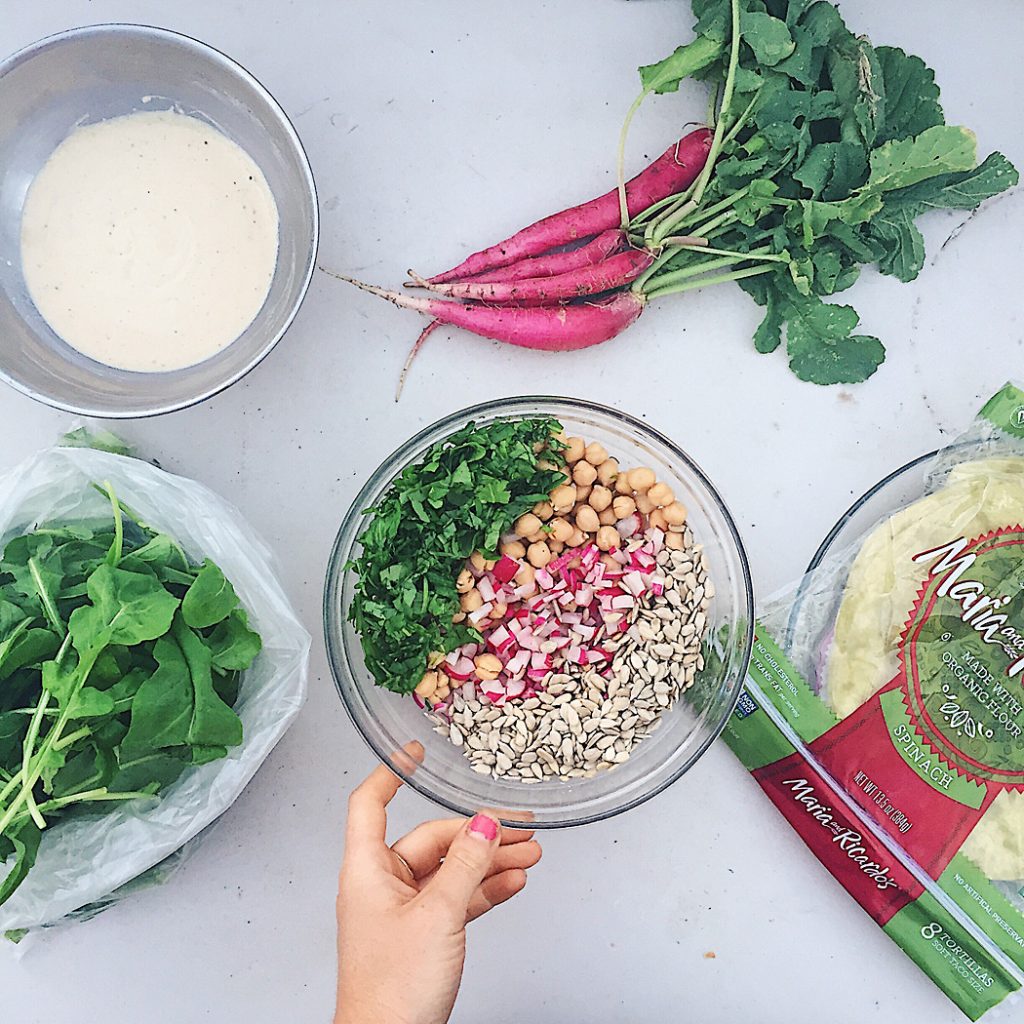
1 15 oz. can chickpeas, rinsed & drained
¾ cup fresh radishes, diced or shredded, depending on size
¼ cup sunflower seeds, raw or toasted
1 large handful arugula, finely chopped
1 Tbsp. parsley, chopped
3–4 tortilla wraps (or chard or collard green leaves)
Optional: chopped celery, red onion, apple.
Honey Mustard Tahini Sauce
This recipe is doubled; reserve about half for dipping, drizzling, and spreading.
¼ cup smooth tahini
¼ cup water
2 Tbsp. lemon juice
1 Tbsp. Dijon mustard, or more
1 ½ tsp. raw honey (optional)
½–1 tsp. garlic powder (or 1 small garlic clove, finely minced)
Salt & pepper to taste
Optional: a pinch of nutritional yeast or a touch of mellow white miso
1. Combine all the ingredients for the sauce together in a small bowl and whisk with a fork until smooth. Taste-test often and adjust to your liking. Set aside.
2. In a large bowl, combine the chickpeas, sunflower seeds, radish, arugula, parsley, sunflower seeds, and any optional additions. Stir in half of the tahini sauce. Place an even amount of the salad on each tortilla and wrap up like a burrito (I love adding an extra handful of fresh arugula to mine). Use the extra sauce as a dip, a drizzle on top, or save for later. Enjoy!
“Happy Trails” Breakfast Cookies
(Makes 12)
When the sun is low in the sky and temperatures are bearable, take some time to prepare and bake these hearty breakfast cookies to have on hand for an on-the-go, kid-friendly breakfast or snack. Even better, invite your kids into the kitchen and encourage them to take part in making these simple treats. Baking is a wonderful way to spend quality time together, and this recipe is both forgiving and fun.
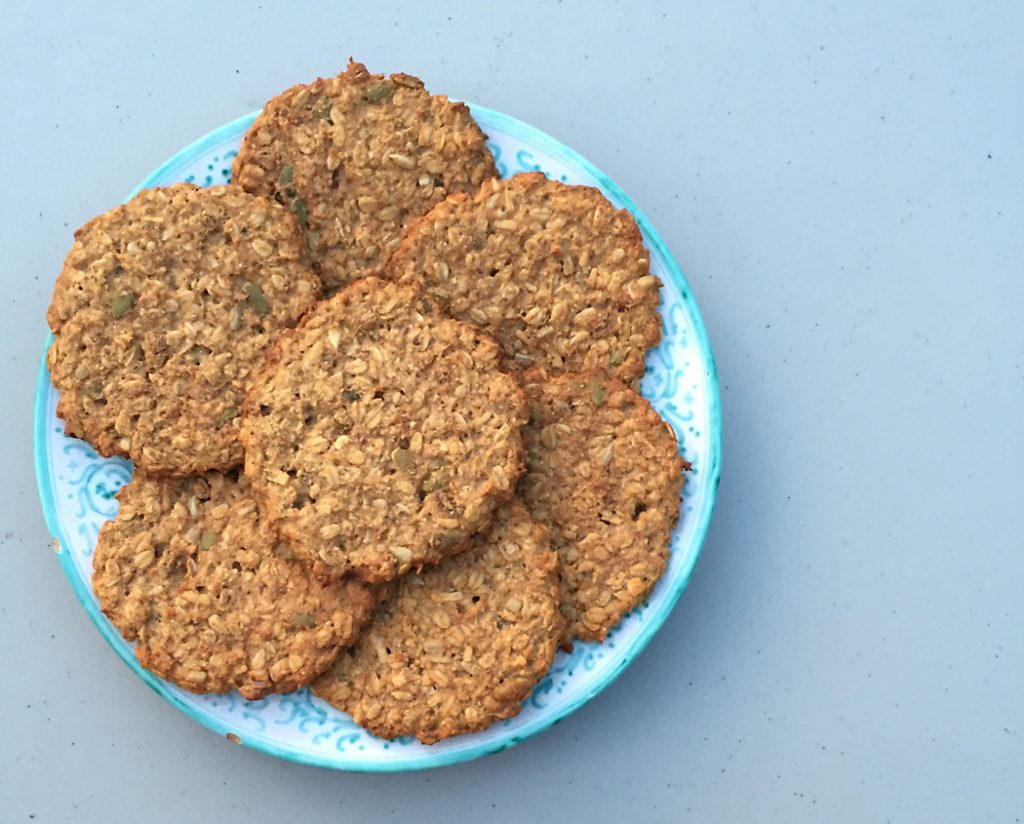
These cookies combine everything you would find in a classic trail mix or granola bar, but incorporate creamy peanut butter and mashed banana to make a substantial cookie dough. They’re just sweet enough to feel like a treat, easy to pack into your purse or pocket, and are rather delightful dunked into your morning coffee.
Dry Ingredients
1 ¼ cups certified gluten-free rolled oats (not the quick-cooking variety)
¾ cup gluten-free flour blend (for this specific recipe, I use the following: ¼ cup + 2 Tbsp. almond flour, ¼ cup coconut flour, and ¼ cup sprouted brown rice flour)
1 tsp. cinnamon
1 tsp. cardamom
½ tsp. baking soda
½ tsp. salt
2 cups add-ins (nuts, seeds, dried fruit, shredded coconut, chocolate, or try my version that includes equal parts raw sunflower and pumpkin seeds, shredded coconut, chopped dried apricots, and golden raisins)
Wet Ingredients
2 very ripe medium bananas, mashed or cut into small pieces (about ½ to ¾ cup)
½ cup creamy peanut butter, stirred (or substitute sunflower butter or almond butter if allergic)
¼ cup maple syrup
3 tsp. melted coconut oil
2 tsp. ground flaxseeds
2 tsp. vanilla extract
1. Preheat oven to 350° F. Line two cookie sheets with parchment paper and set aside.
2. In a large bowl, combine dry ingredients. Whisk to distribute everything evenly, making sure that any fruit bits get a little coating of flour and don’t stick together in large masses. Set aside.
3. Measure all wet ingredients into the bowl of a food processor and pulse to combine. Let the machine run on high until you have an even, smooth mixture. (If you don’t have a food processor, an electric mixer works well—as do your hands! I started making these long before the days of my fancy KitchenAid appliances.)
4. Pour the wet mixture into the dry ingredients, using a rubber spatula to scrape the edges of the bowl. Mix until thoroughly combined. If your dough is too wet and sticky, add more almond flour, one tablespoon at a time.*
5. Drop heaping spoonfuls of dough onto prepared baking sheets. (I use an ice-cream scoop.) Flatten with your palm and shape into a patty, until about 1/4″ thick and roughly circular. (Or leave this thick and rounded if you’d like a softer, more muffin-like interior.) These won’t spread much, if at all, so spacing will depend on the size of your cookie.
6. Slide sheets into oven and bake until lightly golden brown, about 18 to 22 minutes. (Rotate your sheets halfway through if you have any hot spots in your oven.) Cool cookies completely before storing in an airtight container. For longer-term storage, wrap each cookie individually, seal the batch in a Ziploc bag, and freeze. Defrost as needed and enjoy often.
*NOTE: The consistency of this dough will always vary a bit, depending on the ripeness and size of your bananas and the type of nut butter that you use (freshly ground keeps things less oily, by the way). Be prepared to add a bit more flour, and use your hands to feel when you’ve got a workable dough.