
Gardening, for sure, is not rocket science. It’s much harder! You can’t just sit down in your comfy chair and make pristine calculations on a computer. No, you have to go outside. You know, where the weather is. With bugs and animals scurrying every which way, and spores flying through the air just looking for a good time.
But there really is a good time to be had for all in the garden, even for those who choose to return to a house at the end of the day. Some people can get a lot of happiness making food and flowers out of dirt. But it does help to have a degree of success. And afterwards, a shower. So below are some common detours on the road to garden heaven.
#1. It’s May 1st. Hooray, winter is totally over!
It sure might seem like it. There can be warm days early in the month. Nurseries and grocery stores are packed with tender plants. Would-be exercisers are out for their annual bike ride. Mail carriers are starting to wear shorts. Still, I carefully watch the 10-day forecast. My begonias have frozen in the first week of May after getting a “head start” on spring planting. It’s more of a “dead start” when you walk outside and see brown, wilted plants.
Soil temperatures lag behind the warmth in the air. You can try to convince your heat-loving basil and tomatoes that they’ll be happy to get planted early. But they’re the ones who have to plunge their feet into the cold ground. It’s like jumping into a pool on an early spring day. Not always quite what you expected!
So it’s best to let the weather take its twists and turns and settle down before putting tender plants in the garden. A solid frost-free date in Southeast Iowa is somewhere around May 10. But there are some hardier types that can go in earlier. On the vegetable side, broccoli and its brethren, peas, and greens can take a bit of frost. And pansies and petunias can go in the ground well before warm weather has officially arrived.
#2. I’m sure my soil is great. We live in one of the most fertile areas in the world.
So I’ll just put on the tea kettle, head outside, turn over the ground, and be back in a jiffy for a nice warm beverage while listening to All Things Considered.
Well, all things considered, I hope your kettle shuts off by itself. Yes, you might be one of the few lucky people who live on prime, undisturbed farmland, especially if your house was built before bulldozers roamed the earth. Now, it’s just too easy to scrape all the topsoil away and smash it back around haphazardly. Sorry, but the heavy equipment operator might not have been super concerned about how big your carrots would get in the future.
The fact is, the typical garden plot will benefit greatly from soil improvement. This can take a while. Many people like to use a rototiller to break up new ground or to incorporate materials that improve soil fertility. I’ve found that even large tillers don’t go that deep, especially where the soil is dense clay. I just turn over the ground with a garden fork or spade and then sometimes use a tiller to break up clods or mix in organic matter. Usually I can get away with leaving existing vegetation on the ground and inverting the chunks of soil so it gets buried deeply. This works fine if you’re just putting in seeds or small plants the first year.
Here’s the central issue of soil improvement: Plants are kind of hard to please. They like nice things. They evolved in an unspoiled environment that was conducive to their development. Most plants prefer a moist, well-drained soil, free of compaction. That’s actually very picky. They’re saying, “Give us a constant supply of water, but if it’s too much, please get it away from us!”
So we try to accommodate them by pulverizing the soil so that excess water will slip out of the root zone. But then we will add materials like compost or peat moss so it won’t slip away too fast. And that also helps soil aeration. Yep, plant roots need air, too. But not too much!
Fussy, fussy, fussy.
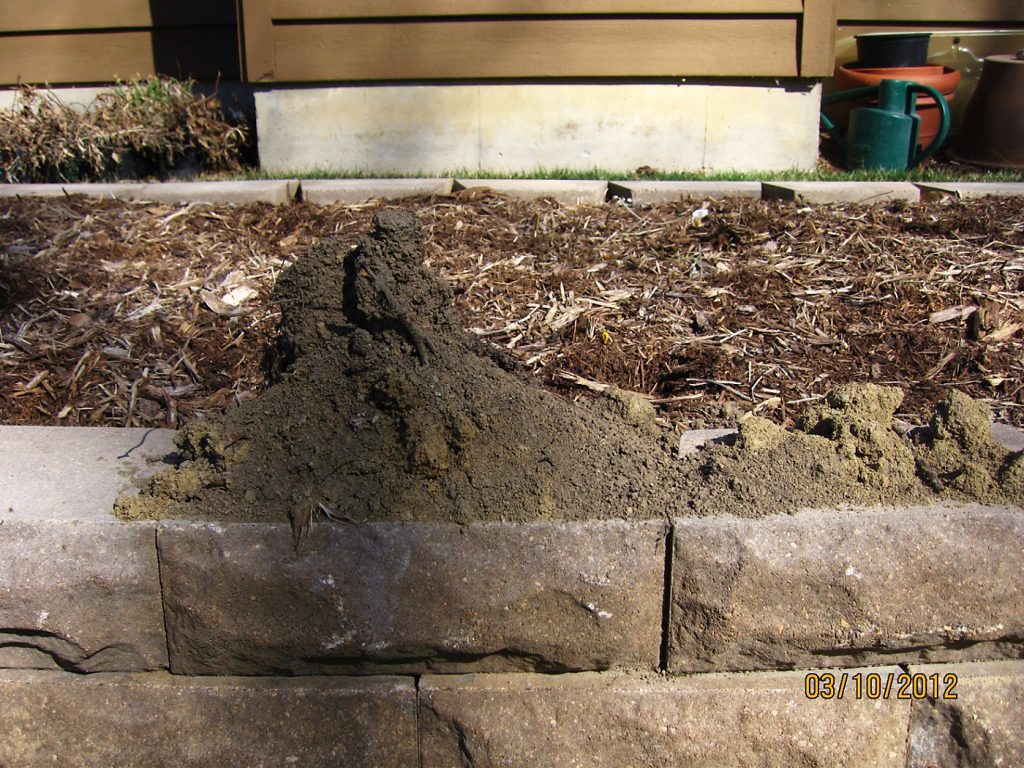
Are there any shortcuts to this time-consuming soil preparation? Yes, sometimes. Many Midwesterners are big on raised beds, and for good reason. Instead of digging down into our predominantly heavy clay soils and potentially creating an underground pond, a gardener can go up by adding extra soil and amendments, allowing excess water to move away more easily. And raised beds delineate the garden space, so that people and riding mowers don’t compact the life out of it. This can greatly reduce your need to turn the garden over every year. Many people use boards or concrete blocks to retain the soil, but it can work just as well to make a pastry-top-like mound with mulch to prevent most erosion.
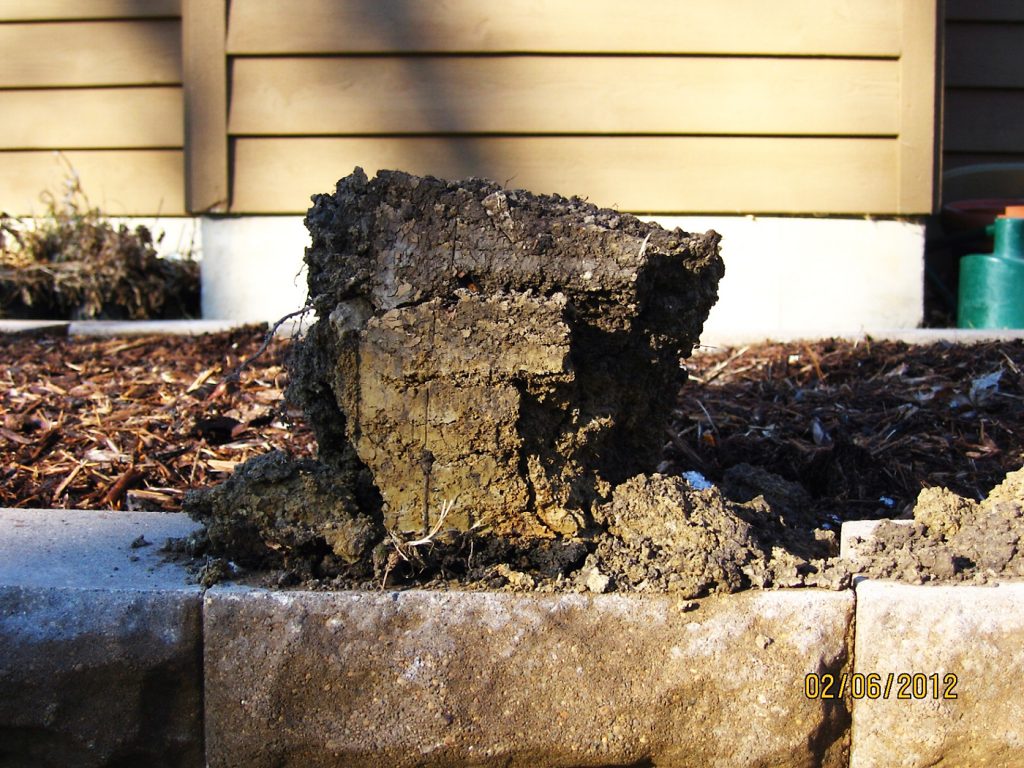
There is one special trick of soil preparation, more magical than reducing belly fat or your home mortgage. I can’t believe it’s not all over the internet! If you simply turn over your soil in the fall, no matter how terrible of a gray, sticky clay that you have, it will be transformed into heaps of fine particles by spring.
Since I’m not a magician, I can divulge that it’s caused by the freezing and thawing that take place through the winter. The very fine clay particles are surrounded by even smaller water molecules, and every time it freezes, they expand and push the clay bits away from each other. More water filters in, and next freeze, the clay is expanded further. Then, in spring, before anything treads on the garden, incorporate organic matter into the lovely granulated soil to prevent it from compacting together again.
This trick can work a bit in very early spring. If you can turn over tight, heavy soil before the freeze/thaw cycle is over, you’ll see some benefit. But fall is the best time. No chopping. Leave it chunky for the cold to get all around it.
#3. I don’t want to go through the hassle of planting flowers every year. I’ll just plant perennials that come back up on their own.
Well, you could, if you don’t mind spending a lot more money for plants that generally don’t bloom for very long. And if you’re sure your soil is in great shape for the long haul, and you won’t change your mind about the plants’ desirability or location. And you don’t mind dealing with insects and diseases that will be tickled to know right where last year’s host will be. Then, okay, go for it!
But there are other issues. Many perennials appear to be fine on Iowa hardiness maps, but they have to get through the winter in your soil. Many of these plants need good to excellent winter drainage or they’ll rot, and all you’ll have left is a $10 dead root.
If your perennials do survive and flourish, many will require division after several years or they’ll lose vigor and die out. Once you’ve dug them up (in the small window of time when they’re dormant), they won’t just fall apart in your hands. You’ll need something between a knife and a jackhammer to slice them into pieces.
It might sound like perennials aren’t really my cup of tea. That’s mostly true, although I wouldn’t want to live without peonies and iris and trumpet lilies. And there are a few longer-blooming perennials that are really valuable in the garden. The beautiful, tall garden phlox has been improved for disease resistance, and some of the coreopsis clan are probably worth the periodic division required.
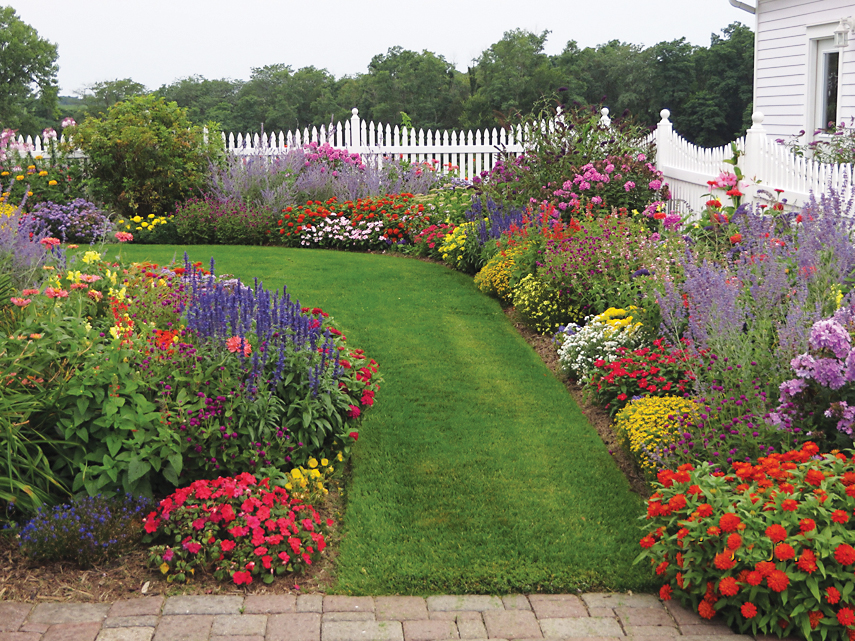
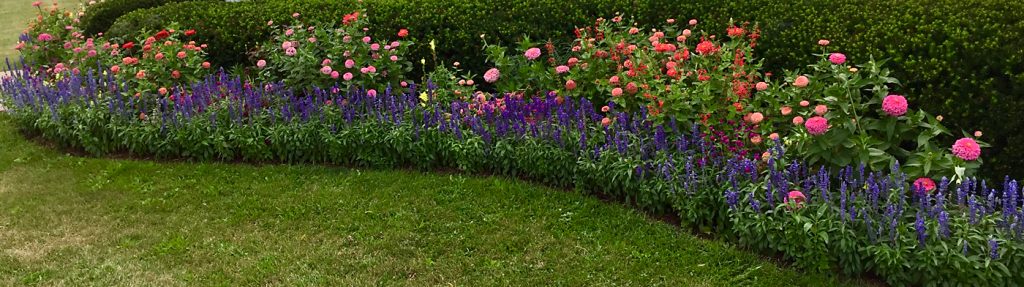
On the other hand, annuals, though they’re just one-season wonders, give you a wide range of colorful, low-cost opportunities to test your soil, your design, and your resolve before making a long-term commitment to a more permanent garden. And if you favor the heat-tolerant species such as zinnias, marigolds, vinca, and ageratum, you’ll have a garden that can bloom from early summer to frost.
At the end of the season, you can turn the whole garden over again if you think there is a need for more soil improvement. That way, your flowers don’t have to endure a cold, soggy winter. They’ll be resting comfortably in a seed packet.
#4. I don’t really see many weeds yet. If they come up later, I’ll get after them or just have a kid pull them out.
Weeds are sneaky. They’re so tiny and insignificant when they germinate, but with a few rains and your attention elsewhere, they can explode into a monster problem. I hate to get all Ben Franklin-y on you, but yes, an ounce of preventive spring hoeing is worth a pound of tedious summer pulling. And the days of hoboes or hoe boys is long, long over. Little Johnny is not going to pull himself away from his computer games on a 90° day during summer vacation to bail you out.
Of course, mulching is a good solution for annual weeds. A few inches of shredded bark or wood chips can make a big difference and conserve moisture as well (provided your soil has good drainage and you want to conserve moisture). But the mulch needs to go down before the weeds appear or have reached a size big enough to push through to sunlight. If that happens, you’ve just made the weeds’ lives more cushy and comfortable.
Perennial weeds are a lot more difficult to eradicate. Some people advocate laying down cardboard before mulching to stifle the stronger plants. This can be helpful, except for one more perennial flower problem: Weeds can hide in the clumps of perennials and then later, when the coast is clear, move back out into the garden. Even bluegrass lawns can move into the garden and infest your preferred plants. They have no moral compass. And in the long run, any kind of edging strips shy of poured concrete will sink or heave, making an opening for the grass to run in. The best solutions are to favor annuals or keep a close eye out for perennial weeds just getting started. A tiny dandelion or mulberry seedling will become a tenacious competitor when it gets larger.
#5. Okay, I’ve got the plants in the ground. There are a few rabbits around, maybe a deer, but now that they have so much to eat, they shouldn’t be a problem.
That’s probably true, if you have a rooftop garden on a high-rise building. Otherwise, the tag team of deer and rabbits will almost certainly try to take down your garden. I consider these two animals to cause 95 percent of all garden problems, although that estimate could be a little low. You can choose your site, fix your soil, select some good plants and mulch. And you may even have some bad bugs come and go. But it’s really hard to convince the ever-present deer and rabbits to have no interest in your garden.
Sure, they enjoy the grass and clover. But gardens have the really good stuff—the plump, coddled, and varied delicacies. And deer and rabbits have just one prime directive: eating. It’s what they do all day, every day, except to rest. And on brief occasions, to make more of themselves. They have no vacation plans. No yoga class. No Netflix. When you drive away or look away, they will help themselves.
There are various repellents that are supposed to work. Sometimes they do. I’ve had much more success with sprays putting off deer rather than rabbits. But they are expensive, smelly, and require repeated applications.
Exclusion, primarily with metal fencing, is the best overall method for preventing damage. Surrounding your entire yard is a great idea, but it can be unsightly and it’s difficult to make an entire fence plus gates completely secure. I prefer the individual caging of plants. Chicken-wire cylinders that are 18–24 inches wide and high are very effective against rabbits. The ends of a cut fence panel can be joined with a stake woven down through the overlapped hexagon grid and then into the ground to keep it secure. And if you have just the right length of stake, you can push it down flush with the cage height for a cleaner and safer design.
In ornamental gardens, painting the cages green can make a huge difference in appearance. I nest all the panels together before making cages and spray with Krylon paint in Satin Italian Olive (not for salads!). It makes the cages almost invisible, so be careful to keep track of them.
With a cage on the taller side, you can bend the top together into a roofline and fasten with ties, clips, or a horizontal stake that will also exclude deer. An extra side stake or landscape pins may be needed to keep larger animals from pushing it over. And with deer, it’s common to use taller, heavier welded wire and metal posts to cage larger trees and shrubs. I still prefer painting those cages green so the plants don’t look like they’re in prison. And one more technical note: All of these wire products are galvanized, so paints don’t initially adhere to them well. I try to buy them a year in advance and leave them out in the elements to break down the finish for painting.
Take it easy
If all of this seems like a lot of work, well, it is—if you do it all at once. Really, another (bonus!) way to have a terrible garden is to go too big and too fast. Most people gravitate to gardening because it’s therapeutic. It can feel wonderful working out in the sunshine and fresh air, getting some exercise. But the therapy quickly dissolves if the project is overwhelmed by soil or weed or animal problems.
I suggest starting with a small garden with a few plants, maybe a few cages if you’re not on a balcony. Then, before too long, you can go inside and rest or work on something simpler. Like rocket science.